This week’s #WorkoutWednesday2019 challenge was by Curtis Harris. We needed to build a heatmap of cohort retention, with a marginal histogram and parameter-based selector. Here’s the goal:

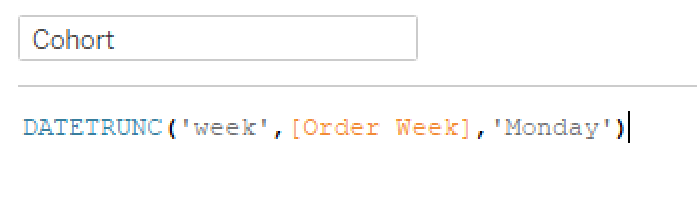
I decided to just work my way from left to right. I first started with a Datetrunc calc to get the cohorts into weekly bins starting on Monday.
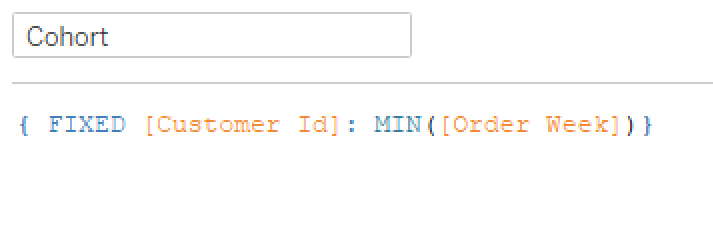
But then when I compared this date to the Order Week values, I noticed they were already in Monday weeks…so I moved on to identifying the first week each customer made an order. I used an LOD to find the earliest week for each Customer ID:
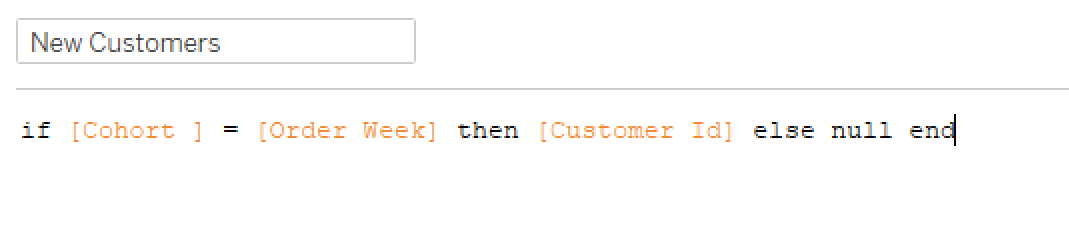
Then, in order to find the number of customers per cohort, I checked to see if the Cohort week matched Order week and populated Customer ID:
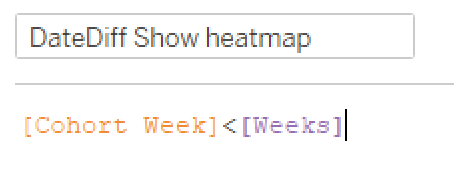
Then I just pulled in my cohort week and a COUNTD of [New Customers] and I got customers by cohort. I stopped there for now and moved on to the heatmap. The heatmap needed to show a retention rate for each week and cohort, so I started with a DATEDIFF for the weeks:

This gives me the week numbers for the columns across the top. Then I built the retention calc:

Again, I used an LOD here. When I reviewed Curtis’ workbook after I finished, he uses a Lookup function. I’ve struggled whenever I use a Lookup to get it to do what I want, and I find I can more accurately define what I want with my LOD calcs (not sure how I did anything before LODs came along).
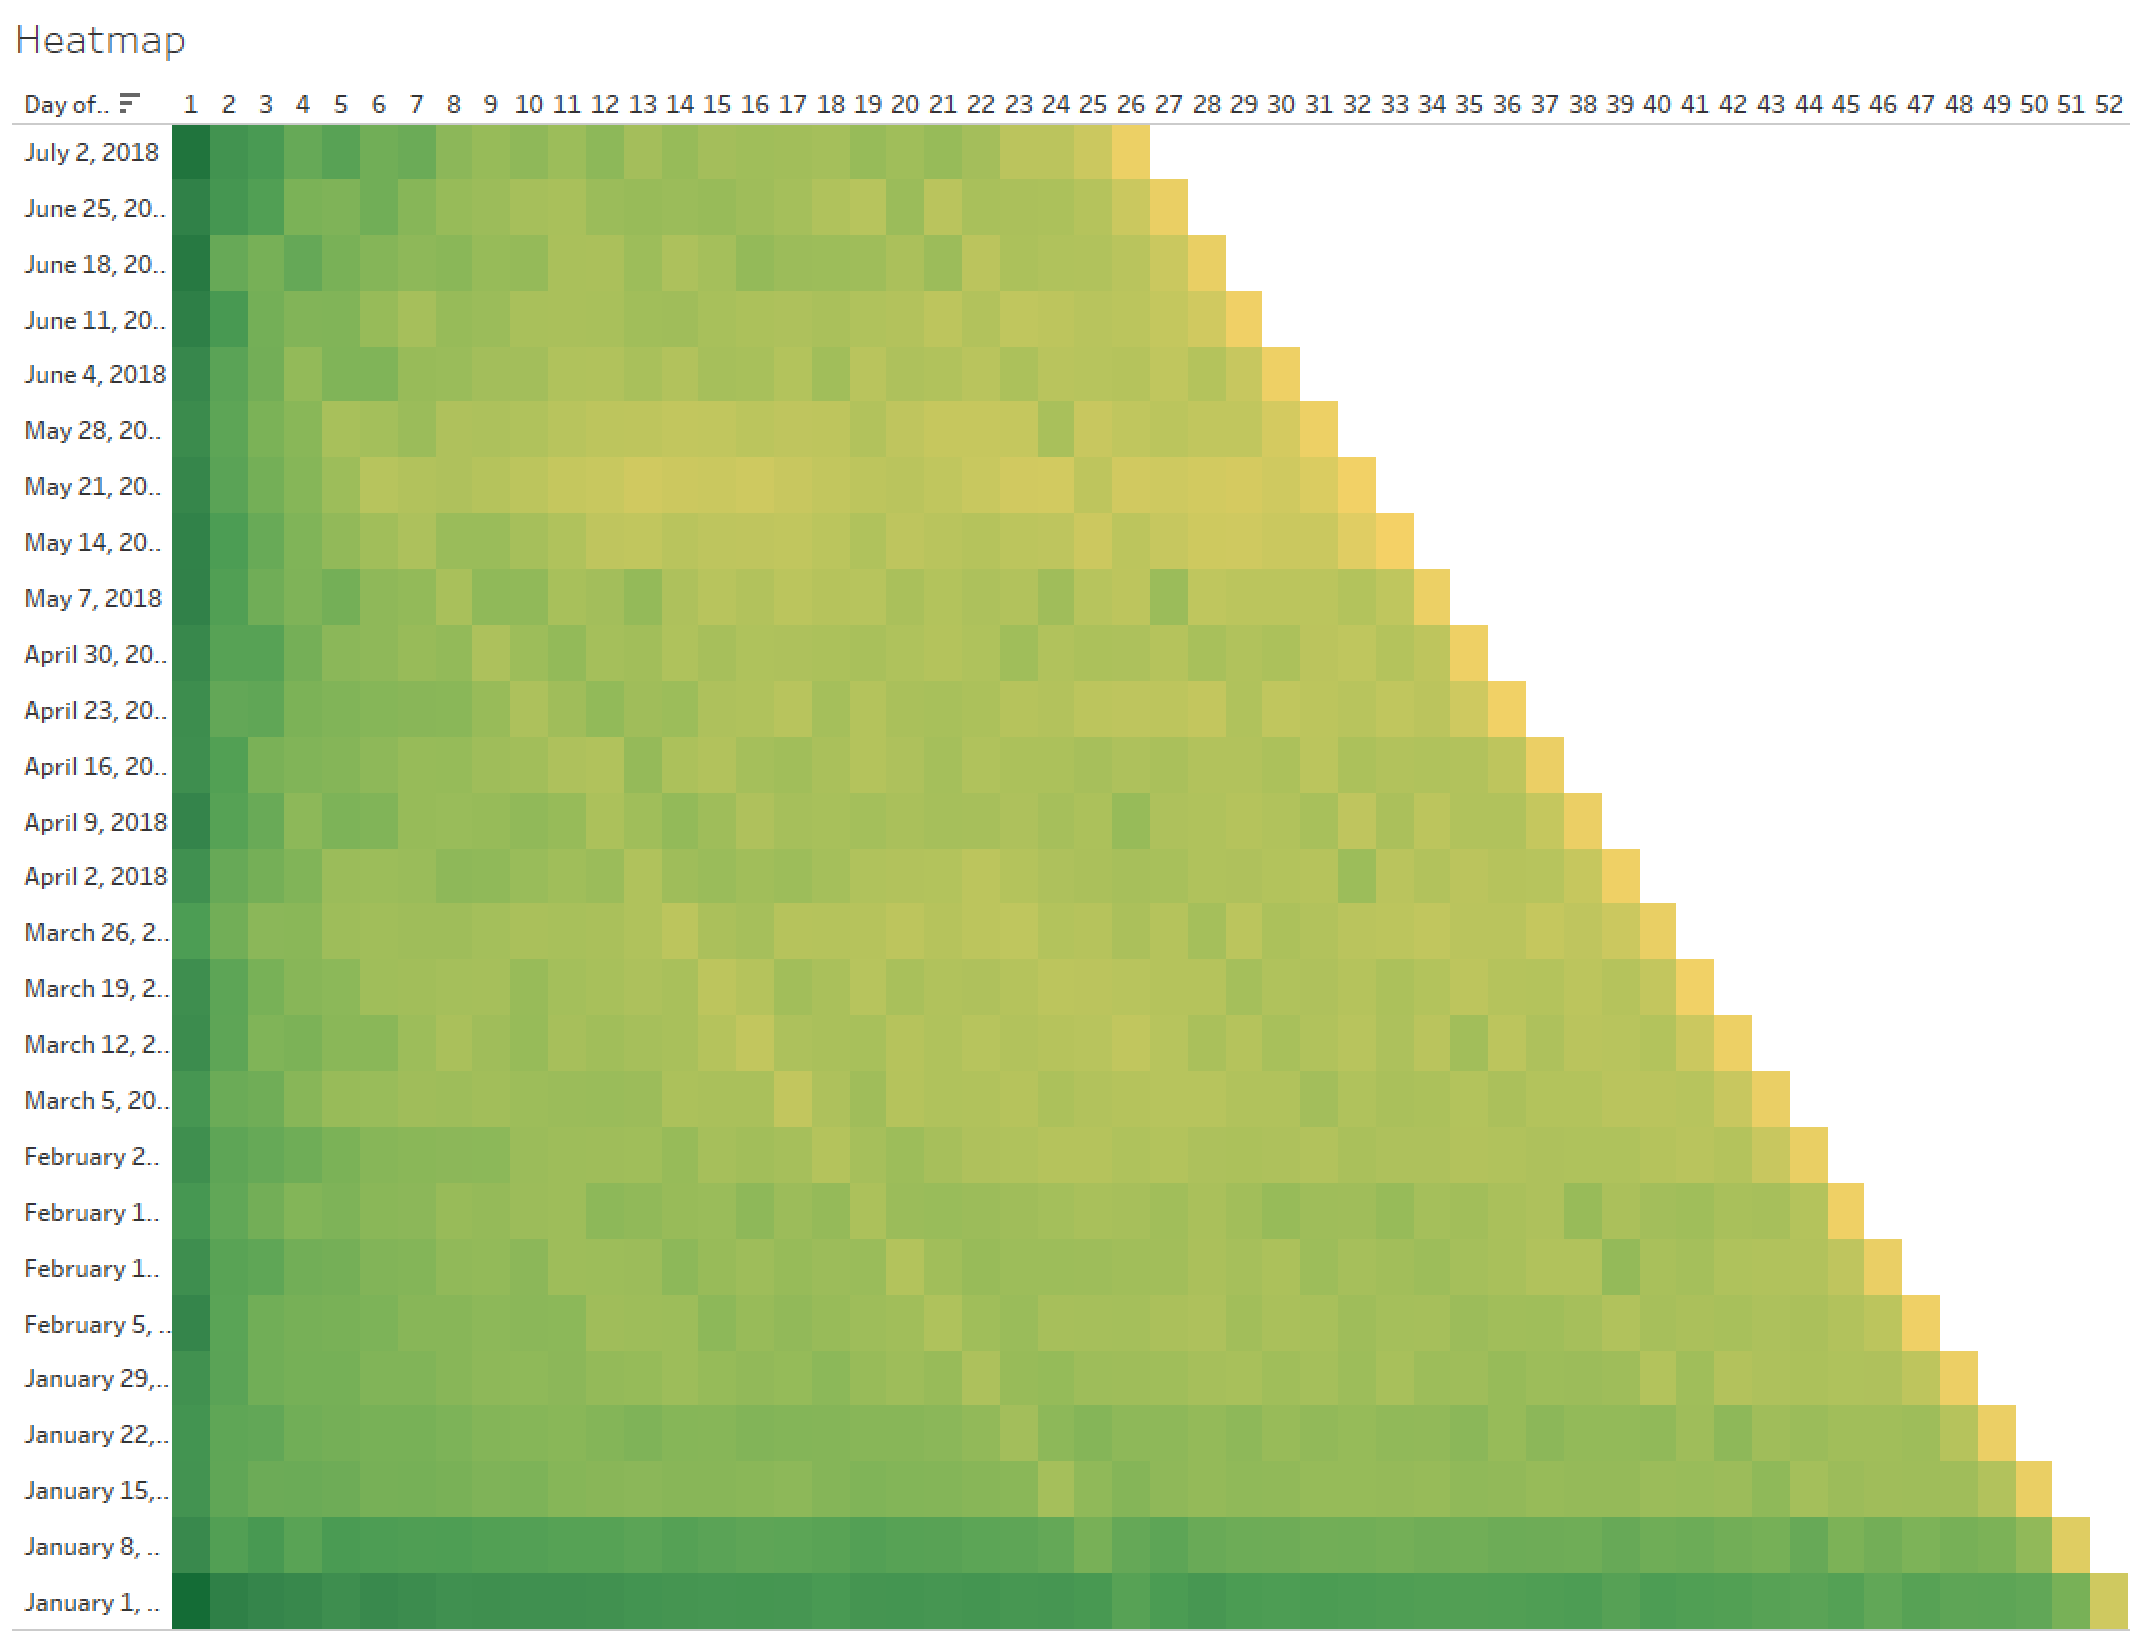
Drop Cohort Week to Columns, DAY(Cohort ) to rows, sort desc, and I get the start of things.

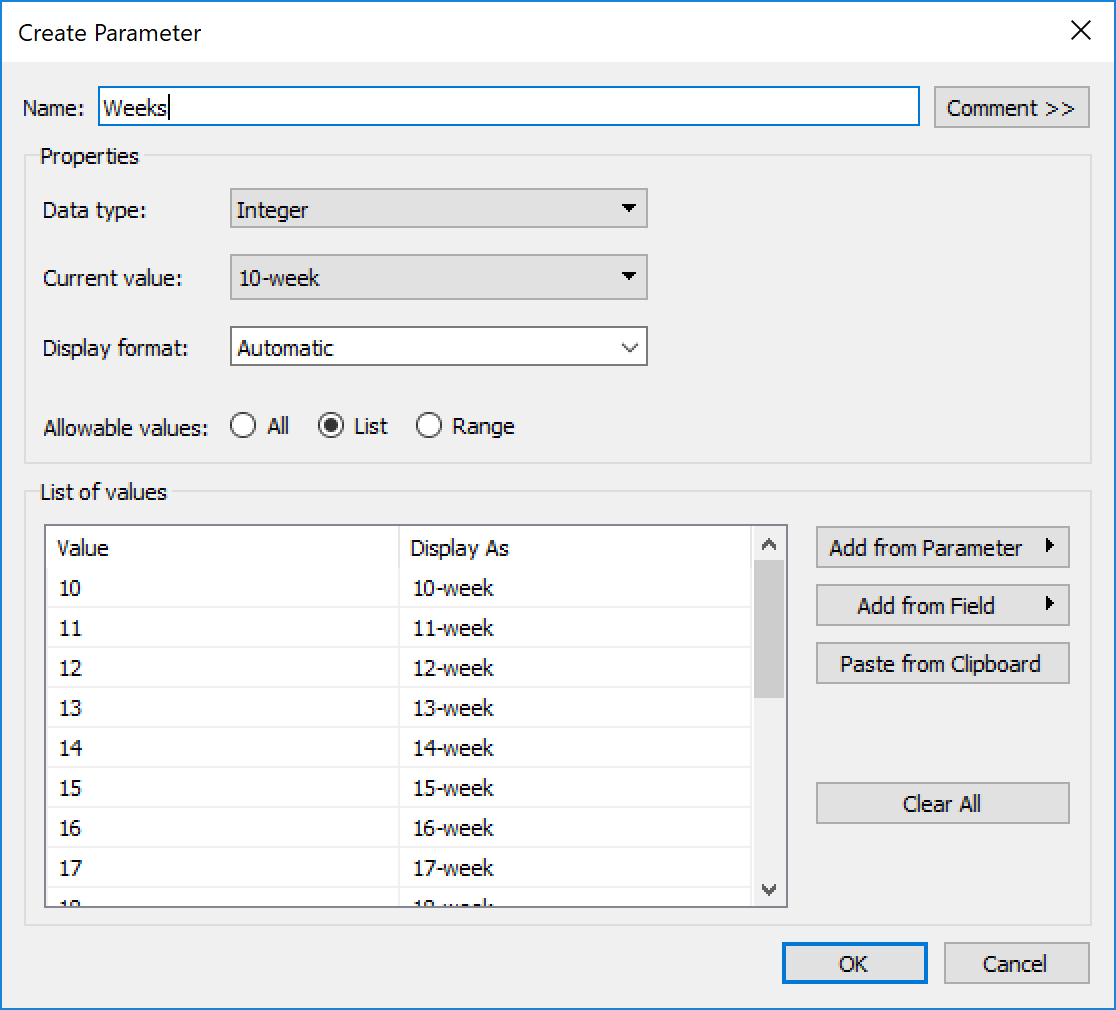
Now I needed to create the parameter for selecting 10-26 weeks. I noticed that Curtis’ parameter wasn’t just a number, it showed “26-week.” I didn’t want to type that 17 times, so I decided to try something new. I opened Excel, put 10-26 in one column, then concatenated the number with “-week.” Then I copied that and clicked Paste from Clipboard in the parameter list area:
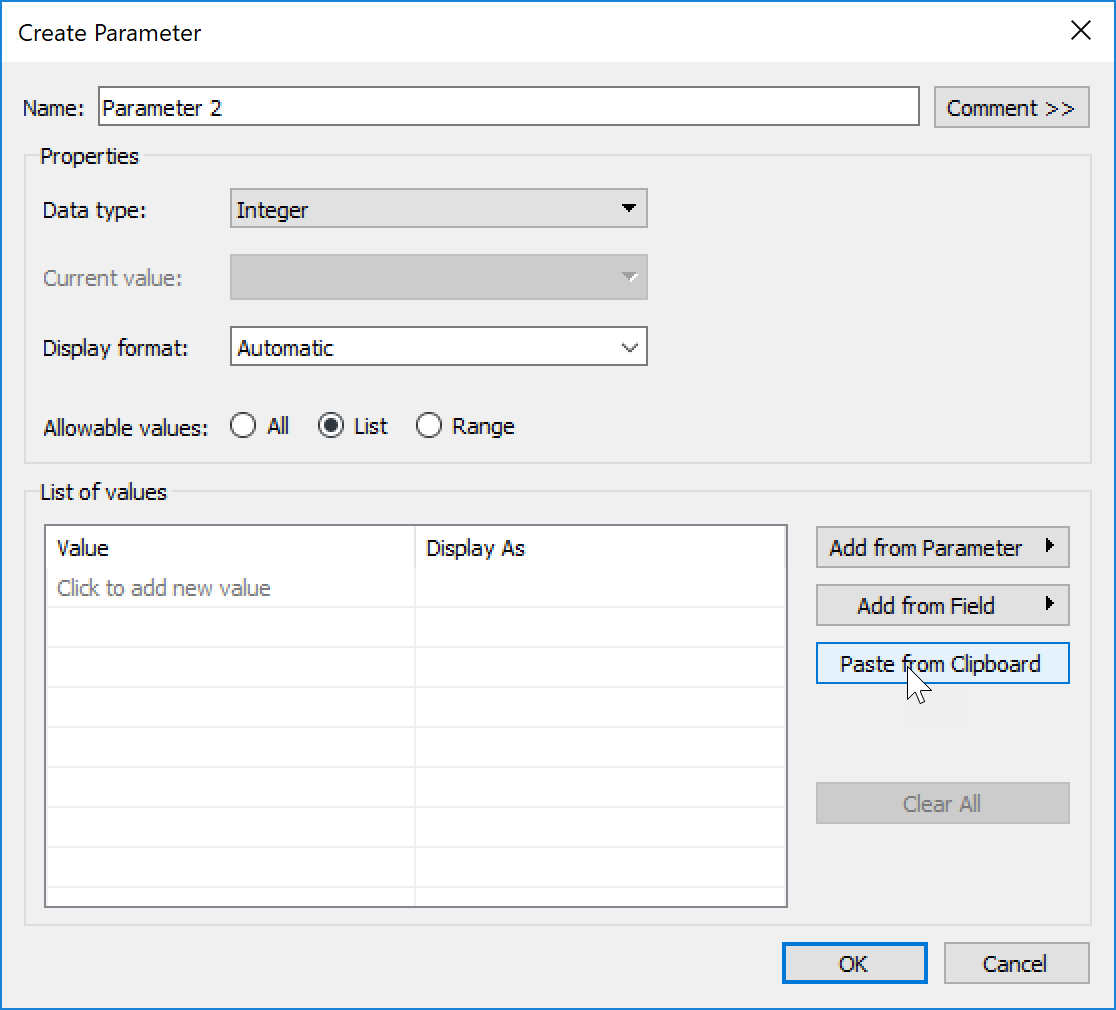
This brings all the values in, and allowed me to keep it as an integer instead of a string value:
Next we need to use this to filter what shows in the view. I decided upon two filters, one to display the right Cohort Weeks (columns) and another to show the Cohort date (rows). First, to show only the Cohorts with completely mature data:
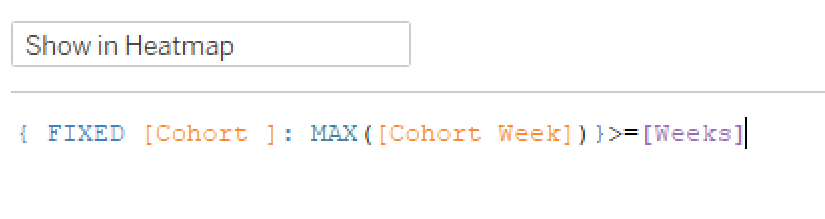
Back to my trusty LOD, I found the Max Cohort Week by Cohort and return True for any that are larger than the parameter value. That got me here:
Now I need to have it only show columns 1-26. That’s easy enough:
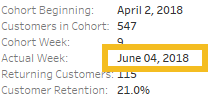
I picked a Yellow/Green Sequential color scheme, not sure where Curtis found his Vidris palette, but I felt like this did the job, and the requirements said any sequential scheme was fine. Uncheck Show Header on the DAY(Cohort) and we just have the tooltips left. This part was pretty straightforward, until I was watching a bit of Andy Kriebel and Lorna Eden‘s head-to-head WW Live webinar. Andy had the eagle eye and noticed that the Actual Week date had leading zeros on the day.
This requires some custom date formatting. So I right clicked on that date on the marks card and adjusted (make sure you’re in the Pane, not the Header in the format pane):
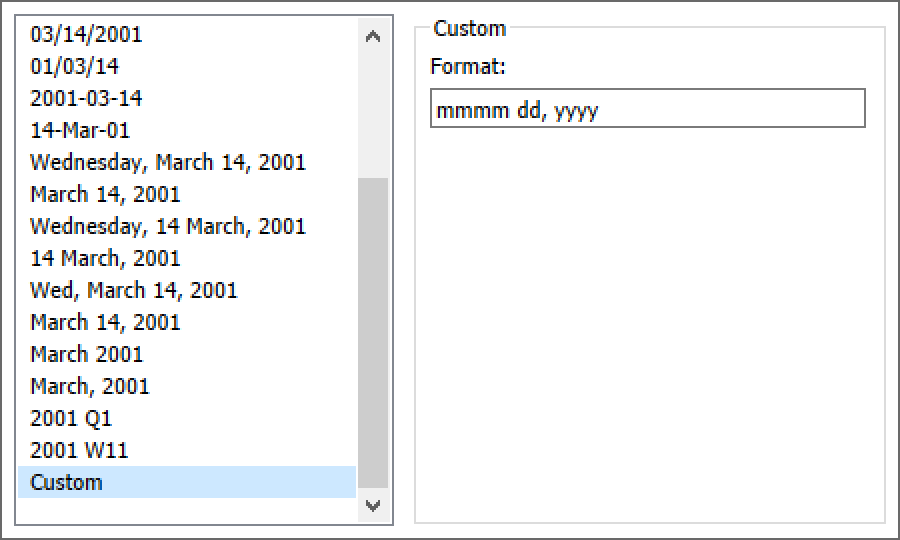
The dd here adds the leading zero if the day is only one digit. (mmmm is the full month name)
And with that, on to the marginal histogram. I kept my Show in Heatmap filter to keep the Cohort rows, and created another calc to filter just to the selected parameter value:
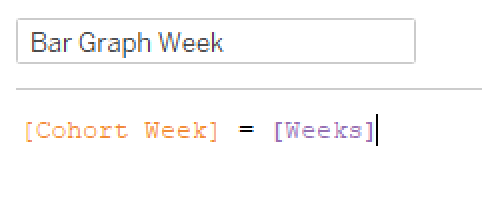
Then I pulled DAY(Cohort) into Rows, Customer Retention into Columns, and added a MIN(.5) to the columns shelf. Make it a Dual Axis, Synchronize the Axis, and now I have my requisite 50% bars with the retention for each cohort shaded. In order to match the grays I just did a Pick Screen Color in Edit Colors. I added a Constant Line at .25 to match Curtis’, but then needed to add “Week 26” to the top of the chart. So I created a quick calc and dragged it onto columns (then hid field labels for columns and aligned left).

I think I started the histogram from duplicating the heatmap, so my tooltips were already in place, just had to make sure they were complete (hovering on the light gray didn’t have the retention rate for some reason).
On to the BAN…which proved to be more difficult than I expected, but more on that in a minute. I kept the Bar Graph Week filter, moved Customer Retention to Text, and voila! 21.2% for week 26….except Curtis has 14.2%. No matter how I tried, I couldn’t get 14.2%, so I reached out to Curtis. He explained that I need to remove the cohort from the view so it was sum(current week customers)/sum(all week zero customers). While that made the math work and I got 14.2%, it didn’t really make sense to me why we would count cohorts in the denominator that didn’t have the chance to mature to the week we’re viewing. Andy mentioned the same thing on their webinar, so I at least didn’t feel like I was barking up the wrong tree. So I followed up with Curtis, and he confirmed that he just forgot to add a filter. 21.2% should be the Week 26 value.
I bring this up not to point out that Curtis was wrong and I was right, but rather that it’s very easy to forget to apply filters and sometimes we need to step back and think about what the numbers are saying. (Aside coming…feel free to skip to the next paragraph for the final dashboard assembly) As an example, a few months ago I was putting together a dashboard at work looking at how often people saved items to Ancestry from one of our sister sites. I shared it to the stakeholders, and got the following response (give or take, with numbers changed to protect the guilty): “Wow! I realize it’s in the Sandbox,” (thankfully, I’ve trained my stakeholders to understand that if something’s in the Sandbox, I’m still working through the numbers, and they should question any and all conclusions)” but a median of 45 items saved per customer, that means that 50K users are saving 45 things to Ancestry! If these numbers hold true, that’s incredible!” Yeah, that gave me pause. So I dug in, and realized I was missing one filter, and forgot to add another to the context in order to properly render an LOD. 45 changed to more like 7, which was still good, but definitely not 45. So, don’t forget to double-check your filters.
Ok, it’s late now, so I’m going to shortcut. Here’s how I arranged things on the dashboard:
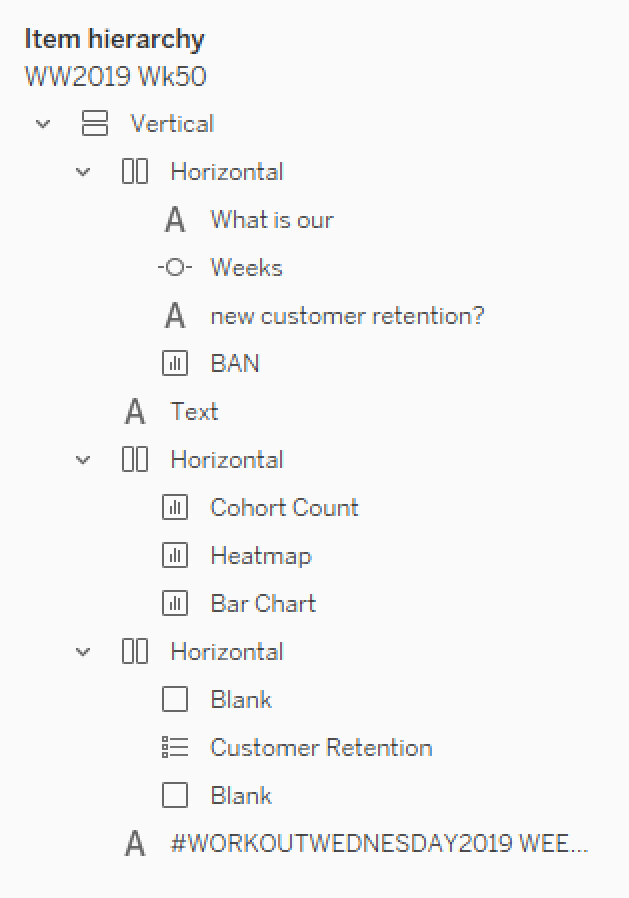
If you’re not familiar with using containers for everything, check out Curtis’ post on that very thing. (Although I shortcut and don’t add the floating Vertical, I just drag the vertical on and then remove the Tiled container from the item hierarchy)
And that’s it! Hopefully this was helpful. There were definitely several differences between how Curtis did his and how I did mine, so take a look at both of them! (Curtis used one worksheet for the customer count and heatmap, while I did separate ones; he used Lookup rather than LOD; I’m sure there are more) Here’s mine if you want to check it out. And thanks for following along!